cartagena guide book
Cartagena: A Comprehensive Guidebook (Updated May 3, 2026)
Cartagena presents a unique South American experience, yet travelers should be prepared for persistent touts, beach harassment, and frequent drug solicitations within the city.
Cartagena, Colombia, is a captivating coastal city brimming with history, vibrant culture, and stunning architecture. However, prospective visitors should arrive prepared for a somewhat assertive tourism environment. While undeniably beautiful, Cartagena presents challenges regarding persistent vendors and potential harassment, particularly on beaches and in popular tourist areas.
Expect frequent approaches offering goods, services – sometimes unwanted – and unfortunately, even illicit substances. Despite these issues, Cartagena’s charm remains potent. The Walled City’s colonial splendor, Getsemaní’s artistic energy, and the nearby islands offer unforgettable experiences. This guide aims to provide a balanced perspective, equipping you with the knowledge to navigate Cartagena safely and enjoy its many wonders, acknowledging the realities of its tourism landscape.
Historical Overview of Cartagena
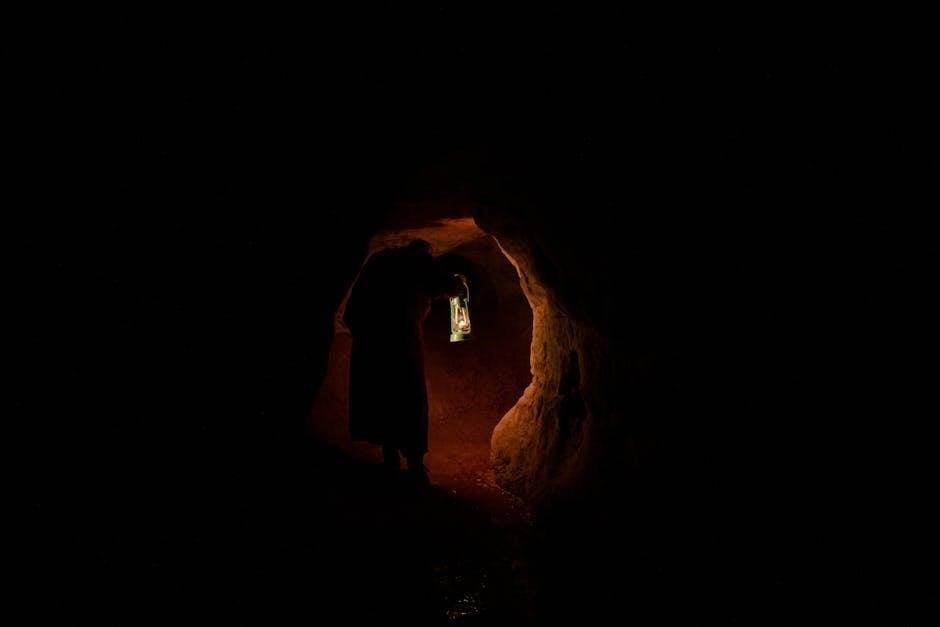
Founded in 1533, Cartagena de Indias boasts a rich and often turbulent history. Initially a strategic port for Spanish colonial trade, it became a prime target for pirates, necessitating the construction of impressive fortifications – notably Castillo San Felipe de Barajas. These defenses successfully repelled numerous attacks, safeguarding the city’s wealth and importance.
Cartagena played a crucial role in the Spanish Main, facilitating the transport of silver and gold back to Europe. The Palace of the Inquisition stands as a stark reminder of the Spanish colonial period’s religious control. Throughout its history, Cartagena has also been a significant center for the slave trade. Today, the city’s UNESCO World Heritage-listed Walled City preserves this layered past, offering a tangible connection to centuries of history.

Understanding Cartagena’s Neighborhoods
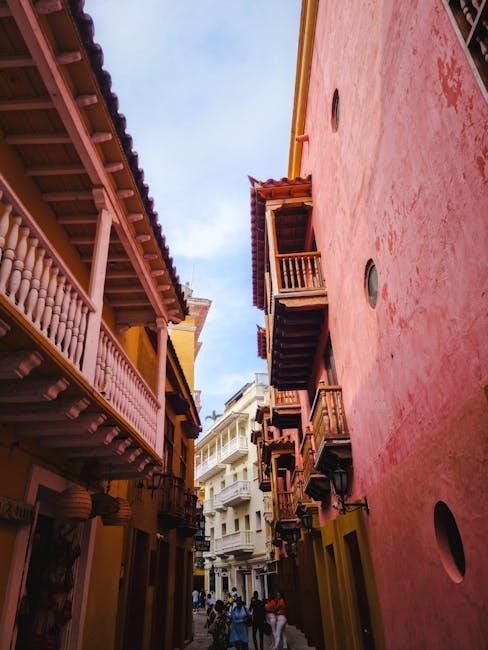
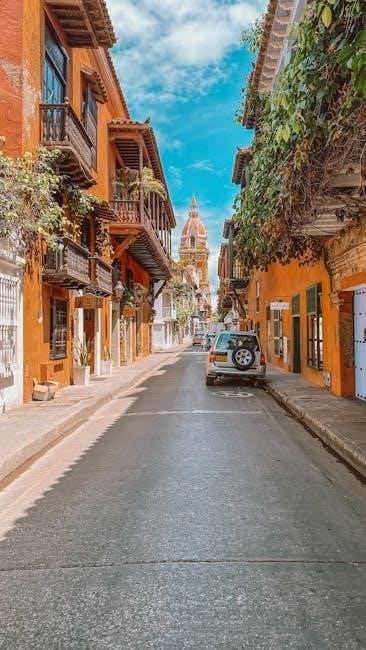
Cartagena’s distinct neighborhoods each offer a unique atmosphere and experience for visitors. The Walled City (Ciudad Amurallada) is the historical heart, characterized by colorful colonial architecture, upscale boutiques, and vibrant plazas. Getsemaní, once a working-class district, has transformed into a bohemian hub with captivating street art and lively nightlife.
In contrast, Bocagrande presents a modern, high-rise landscape with beachfront resorts, shopping malls, and a more contemporary vibe. Exploring these diverse areas is key to understanding Cartagena’s multifaceted character. Be aware that safety concerns and persistent vendors vary significantly between these districts, impacting the overall travel experience.
The Walled City (Ciudad Amurallada)
Stepping into the Walled City is like traveling back in time, surrounded by beautifully preserved colonial architecture and imposing fortifications. Explore the narrow, winding streets lined with colorful buildings, boutique hotels, and charming cafes. Be prepared for a constant stream of people and potential touts attempting to sell goods or services.
Visitors should exercise caution regarding pickpockets and be mindful of their belongings, especially in crowded areas. While visually stunning, the Walled City can feel overwhelming due to the persistent sales pitches and the close proximity of onlookers. It’s a must-see, but awareness is crucial.
Getsemaní: A Vibrant and Artistic District
Getsemaní pulses with a lively, bohemian energy, offering a stark contrast to the more formal Walled City. Famous for its vibrant street art, this district attracts artists and travelers alike. However, be aware of increased scrutiny and potential safety concerns, particularly on streets like Cambio Bueno, where individuals may closely observe passersby.
Expect persistent offers for drugs, even immediately after leaving restaurants or crossing streets. While generally safe, maintaining situational awareness is vital. Getsemaní’s energetic atmosphere is captivating, but vigilance is key to enjoying its charm without unwanted encounters.
Bocagrande: Modern Cartagena
Bocagrande offers a contemporary contrast to Cartagena’s historic center, boasting high-rise hotels and a bustling beachfront. While providing convenient resort-style accommodation, be prepared for aggressive beach vendors who may attempt unsolicited massages or services.
These vendors often persist even after direct refusals, sometimes demanding payment for unwanted attention. Maintaining a firm and assertive demeanor is crucial. Though offering modern amenities, Bocagrande’s beach experience can be less relaxing due to constant hassling. Be mindful of your belongings and surroundings while enjoying the area’s conveniences.
Navigating Cartagena: Transportation Options
Getting around Cartagena involves several choices, each with its own advantages and drawbacks. Taxis and ride-sharing services are readily available, offering convenient door-to-door transport, but agree on a fare beforehand to avoid inflated prices. Public buses are a budget-friendly option, though routes can be complex for newcomers.
However, the most enjoyable way to explore the Walled City is on foot; its compact size makes walking ideal. Be aware of your surroundings, especially in areas like Getsemaní’s “Cambio Bueno” street, where increased vigilance is advised due to reported safety concerns and potential solicitations.
Taxis and Ride-Sharing Services
Taxis are plentiful in Cartagena, providing a convenient, though sometimes costly, transportation option. Always confirm the fare with the driver before starting your journey to prevent unexpected charges. Ride-sharing apps like Uber and Didi also operate in the city, often offering more transparent pricing.
Be mindful of unofficial taxis; stick to registered cabs or app-based services for safety. While generally reliable, it’s wise to share your ride details with someone and remain aware of your surroundings, particularly during nighttime travel. Negotiating a price upfront remains crucial for a smooth experience.
Public Transportation (Buses)
Cartagena’s public bus system is an affordable way to navigate the city, but it can be challenging for first-time visitors. Routes are extensive, covering most areas, including Bocagrande and Getsemaní, but information in English is limited. Buses are often crowded, especially during peak hours, and lack clear signage indicating stops.

Locals are generally helpful in guiding you, but learning basic Spanish phrases related to destinations is highly recommended. Be aware of your belongings due to potential pickpocketing. While economical, the bus system requires patience and a willingness to embrace a more local travel experience.
Walking within the Walled City
Exploring Cartagena’s Walled City on foot is the most rewarding way to experience its charm. The compact layout and pedestrian-friendly streets invite leisurely strolls, revealing colorful colonial architecture, vibrant plazas, and hidden courtyards. However, be mindful of your surroundings, as petty theft can occur, particularly in crowded areas.
Keep valuables secure and avoid displaying expensive jewelry or electronics. Be prepared for uneven cobblestone streets – comfortable shoes are essential! Watch out for persistent vendors and individuals offering unsolicited services. Despite these cautions, walking allows for an immersive experience, uncovering the city’s historical beauty.
Safety Considerations for Travelers
Cartagena, while captivating, demands traveler vigilance. Petty theft and scams are prevalent; secure belongings and be wary of overly friendly strangers. Drug-related approaches are frequent, even in public areas like the Old Town – firmly decline any offers. Beach safety is also crucial; aggressive vendors offering massages or other services without consent are common, and can be persistent even after refusal.
Be assertive in declining unwanted attention and avoid isolated areas, especially at night. Reports indicate harassment and attempts to initiate unwanted physical contact. Remain aware of your surroundings and trust your instincts to ensure a safe and enjoyable visit.

Petty Theft and Scams
Be acutely aware of your belongings in Cartagena. Reports highlight a prevalence of petty theft, particularly in crowded areas and tourist hotspots like Getsemani’s Cambio Bueno street, where individuals closely observe passersby. Scams also exist, with some individuals attempting to distract you while others pilfer valuables.
Avoid displaying expensive jewelry or electronics, and keep wallets and phones secure. Be cautious of overly friendly individuals offering assistance, as this can be a tactic for distraction. Exercise vigilance when withdrawing money from ATMs, and always be mindful of your surroundings to mitigate the risk of becoming a target.
Drug-Related Issues and Approaches
Cartagena unfortunately experiences a noticeable issue with individuals aggressively offering drugs to tourists. Expect approaches – sometimes immediately after leaving restaurants or crossing streets – with solicitations for cocaine and other substances. These offers can be persistent and occur in seemingly public and visible locations, even near hotels.
Firmly and repeatedly decline any offers, and avoid engaging in conversation. Do not accept anything from strangers. Be aware that accepting or purchasing drugs is illegal and carries severe consequences. Report any particularly aggressive or concerning encounters to local authorities, though direct intervention may be limited.
Beach Safety and Harassment
Cartagena’s beaches, while beautiful, are known for aggressive vendor behavior. Expect constant attempts to sell services – chairs, massages, food – often extending beyond a simple offer. Unsolicited massages are common, with vendors sometimes initiating contact without permission and then demanding payment, even after a clear refusal.
Be firm in declining unwanted services and prepared to repeat yourself. Some vendors may attempt to guilt-trip or insult you if you refuse to pay. Remain vigilant with your belongings, as the constant activity can create opportunities for petty theft. Prioritize your comfort and don’t hesitate to move if harassed.
Top Attractions and Things to Do
Cartagena boasts a wealth of historical and cultural attractions. Castillo San Felipe de Barajas, a massive fortress, offers stunning views and a glimpse into the city’s defensive past. The Palace of the Inquisition provides a sobering look at colonial justice.

Beyond historical sites, immerse yourself in the vibrant street art scene of Getsemaní, a neighborhood brimming with creativity. Explore the colorful streets, discover hidden plazas, and soak up the local atmosphere. Consider a boat trip, but be aware of potential harassment on more secluded beaches, particularly regarding unsolicited services.
Castillo San Felipe de Barajas
This imposing fortress stands as a testament to Cartagena’s strategic importance and resilience. Built by the Spanish to defend against attacks, Castillo San Felipe de Barajas offers panoramic views of the city and the Caribbean Sea. Explore its intricate network of tunnels, ramparts, and plazas, imagining life during colonial times.
Allow ample time to wander through the complex, discovering hidden chambers and appreciating the engineering marvel. Be prepared for warm temperatures and bring water. The fortress provides a fascinating historical context for understanding Cartagena’s past and its enduring spirit.
Palace of the Inquisition
The Palace of the Inquisition, a stark reminder of a dark period in Cartagena’s history, now serves as a museum detailing the practices of the Spanish Inquisition. Explore the exhibits showcasing instruments of torture and accounts of those who suffered within its walls. The building’s architecture itself is a captivating blend of colonial styles.
Prepare for a somber and thought-provoking experience. The museum offers a crucial insight into the religious and political climate of the colonial era. Reflect on the stories of injustice and the enduring human spirit while visiting this historically significant landmark.
Street Art in Getsemaní
Getsemaní’s vibrant streets are a canvas for incredible street art, transforming the neighborhood into an open-air gallery. Wander through the colorful alleyways and discover murals depicting historical figures, social commentary, and stunning abstract designs. The art reflects the neighborhood’s rebellious spirit and artistic energy.
Beyond simply viewing the art, engage with the local culture it represents. Many pieces tell stories of Cartagena’s past and present. Take a guided tour to learn about the artists and the meaning behind their work, or simply lose yourself in the visual feast that Getsemaní offers.

Beaches Near Cartagena
While Cartagena’s city beaches aren’t known for tranquility, several stunning beaches are accessible via boat trips. Playa Blanca on Barú Island offers white sand and turquoise waters, but be prepared for aggressive vendors relentlessly offering massages, goods, and services.
The Islas del Rosario, a coral reef paradise, provide a more secluded experience, though persistent sales tactics still exist. Visitors report unwanted physical contact and demands for payment even after declining services. Be firm, assertive, and aware of your surroundings to enjoy a relaxing beach day.
Playa Blanca (Barú Island)
Playa Blanca, located on Barú Island, is famed for its pristine white sand and inviting turquoise waters, making it a popular day trip from Cartagena. However, be forewarned: the beach is notorious for incredibly aggressive vendors. Expect constant, unrelenting attempts to sell massages, food, and various goods, often without respecting a polite ‘no’.
Visitors frequently report unwanted physical contact, like vendors attempting to start massages without permission, and subsequent demands for payment. Maintaining a firm and assertive demeanor is crucial to avoid unwanted interactions and enjoy the beach’s natural beauty.
Islas del Rosario: A Coral Reef Paradise
The Islas del Rosario are an archipelago offering stunning coral reefs and clear waters, ideal for snorkeling and diving excursions from Cartagena. Boat trips are readily available, often including stops at various islands and a designated lunch spot. However, similar to Playa Blanca, be prepared for persistent vendor activity.
Reports indicate aggressive attempts to sell massages, even while you are eating, and unwelcome physical contact. Maintaining boundaries is essential. The “Tranquil Beach” area, despite its name, is particularly known for this issue, so vigilance is advised to fully appreciate the islands’ natural splendor.
Beware of Aggressive Beach Vendors
Cartagena’s beaches, while beautiful, are unfortunately known for incredibly persistent and often aggressive vendors. This extends beyond typical service offers like chair rentals or drinks; expect constant hassling and attempts to initiate unwanted services. Reports detail vendors attempting to start massages without permission, continuing even after direct refusal, and then demanding payment.
Be firm and direct in declining offers, as politeness may be misinterpreted. Some vendors have been reported to be confrontational or even insulting if you refuse. Maintaining awareness of your surroundings and belongings is crucial to avoid unwanted interactions and ensure a relaxing beach experience.

Food and Drink in Cartagena
Cartagena’s culinary scene is a delightful fusion of Caribbean flavors and traditional Colombian cuisine. Expect abundant seafood dishes, often prepared with coconut milk and local spices. Ceviche, fresh fish marinated in citrus juices, is a must-try, alongside arroz con coco (coconut rice).
Venture beyond restaurants to experience the vibrant street food culture – arepas, empanadas, and fresh fruit juices are readily available. Be mindful of food safety and choose vendors with high turnover. Don’t forget to sample local fruit juices and enjoy a refreshing limonada de coco!
Traditional Colombian Cuisine
Cartagena offers a fantastic introduction to Colombia’s diverse culinary heritage. Beyond the coastal influences, savor hearty dishes like bandeja paisa, a substantial platter with beans, rice, meat, avocado, and a fried egg. Ajiaco, a creamy chicken and potato soup, is another comforting classic, often served with capers and avocado.
Explore local eateries for authentic flavors and generous portions. Don’t miss trying arepas – grilled corn cakes – which are a staple throughout Colombia and come with various fillings. Colombian coffee is world-renowned, so indulge in a cup or two!
Seafood Specialties
Given its coastal location, Cartagena boasts incredibly fresh and flavorful seafood. Ceviche, marinated raw fish, is a must-try, often prepared with lime juice, onions, and cilantro. Look for arroz con coco (coconut rice) served alongside fried fish – a classic Caribbean combination.
Red snapper (pargo rojo) is a local favorite, prepared grilled, fried, or in a flavorful sauce. Shrimp (camarones) dishes are also abundant. Many restaurants offer mixed seafood platters, allowing you to sample a variety of local catches. Be sure to explore the restaurants in Getsemaní for authentic, affordable options.
Street Food Experiences
Cartagena’s street food scene is vibrant and offers a delicious, affordable way to experience local flavors. Arepas con huevo, corn cakes filled with egg, are a popular breakfast or snack. Empanadas, savory pastries filled with meat or cheese, are readily available from street vendors.
Don’t miss trying palenqueras’ fruit salads – colorful displays of tropical fruits served by women in traditional Palenquera attire. Be cautious about hygiene; choose vendors with high turnover and visibly clean preparation areas. Enjoying street food is a fantastic way to immerse yourself in the city’s culture!
Accommodation Options
Cartagena offers a diverse range of lodging to suit every budget and preference. The Walled City boasts charming boutique hotels, often housed in restored colonial buildings, providing an immersive historical experience. Hostels in Getsemaní are ideal for budget travelers and those seeking a social atmosphere.
For a more resort-style stay, Bocagrande features numerous high-rise hotels and all-inclusive options along the beach. Consider proximity to attractions and safety when choosing; Getsemaní offers a lively, authentic vibe, while Bocagrande provides convenience and modern amenities.
Boutique Hotels in the Walled City
The Walled City’s boutique hotels offer an intimate and historically rich experience. Many are beautifully restored colonial mansions, featuring courtyards, balconies, and rooftop terraces; Expect personalized service and unique décor, often reflecting Cartagena’s vibrant culture.
These hotels typically command higher prices, but the location is unbeatable – steps from key attractions, restaurants, and plazas. Consider options with included breakfast and concierge services for added convenience. Booking in advance is highly recommended, especially during peak season, to secure your preferred choice within this coveted area.
Hostels in Getsemaní
Getsemaní is a haven for budget travelers, boasting a vibrant hostel scene. These accommodations offer a social atmosphere, perfect for meeting fellow adventurers and experiencing the neighborhood’s artistic energy. Expect dorm rooms and private options, often with communal kitchens and lively common areas.
Hostels in Getsemaní are strategically located near street art, cafes, and nightlife. While offering affordability, be mindful of safety, particularly at night, and choose hostels with secure lockers and positive reviews regarding security measures. This district provides an authentic Cartagena experience, blending culture with budget-friendly lodging.
Resorts in Bocagrande
Bocagrande offers a distinctly modern Cartagena experience, dominated by high-rise resorts catering to those seeking comfort and convenience. These hotels typically feature beachfront access, swimming pools, on-site restaurants, and a range of amenities like spas and fitness centers.
While providing a more secluded and controlled environment, Bocagrande can feel removed from the historical charm of the Walled City and Getsemaní. Be aware of potential beach harassment, as vendors can be quite persistent. Resorts offer a safe base, but venturing out requires caution, especially regarding unsolicited offers and potential scams.